Doing your own renovation planning application can feel empowering for about ten minutes.
Then the checklist opens.
Location plan. Block plan. Existing elevations. Proposed elevations. Roof plan. Ownership certificate. Design statement, maybe. Heritage statement, maybe. Drainage detail, maybe.
If you are not an architect, it can feel like the system is speaking in code.
This guide focuses on the map side of the process. It is for homeowners planning a renovation, extension, conversion, outbuilding, driveway change, or mixed DIY project who want to understand which planning application maps are actually needed before they press submit.
It is not legal advice, and every council can have its own validation checklist. But the core map logic is consistent across most UK householder applications.
A plain-English guide for DIY renovators preparing a planning application, including location plans, block plans, drawings, red lines, and when to use CAD.
The quick answer
Most DIY renovation applications need:
- A site location plan
- A block plan, also called a site plan
- Project drawings such as elevations, floor plans, roof plans, or sections where relevant
The maps identify and explain the site. The drawings explain the building work.
That distinction matters.
A planning map is not the same as an elevation. An elevation is not the same as a site plan. A Land Registry plan is not the same as an Ordnance Survey planning map.
Once you separate the documents by job, the checklist becomes much less intimidating.
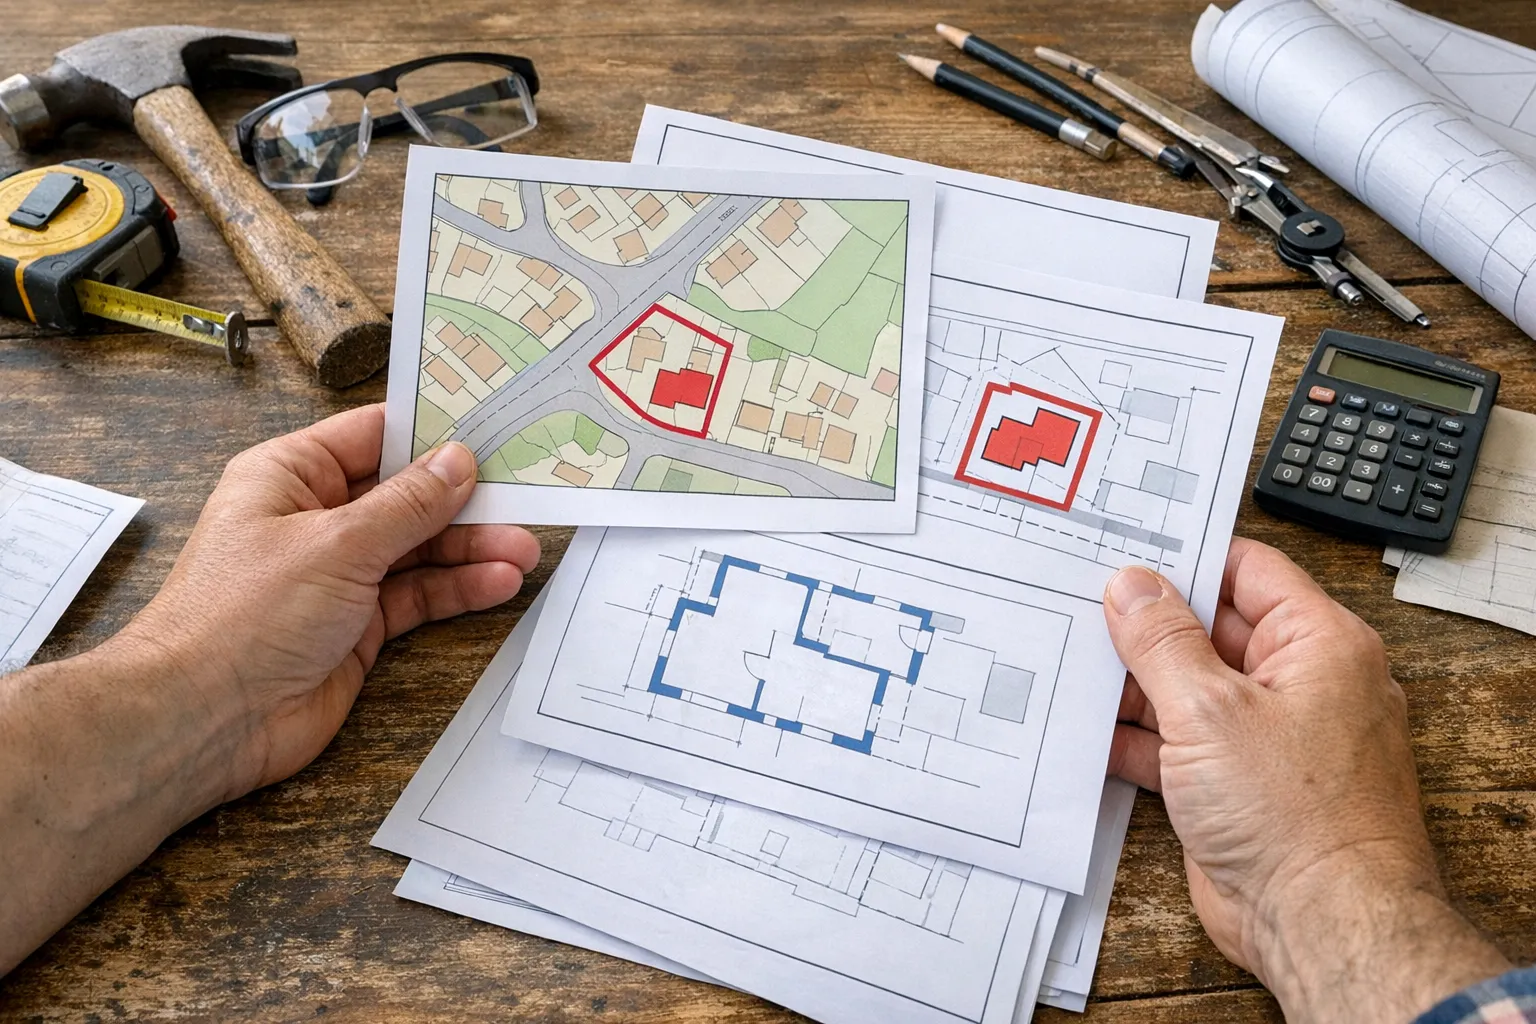
What the site location plan does
The site location plan is the wider map.
It usually uses a 1:1250 scale for urban and suburban properties, or 1:2500 for larger or rural sites. It shows the application property in relation to nearby roads, buildings, and surrounding land.
Its main job is simple: identify the site beyond doubt.
That is why it normally needs:
- A red line around the application site
- A north point
- A clear scale
- Enough nearby roads or buildings to locate the property
- A suitable Ordnance Survey base map
For a DIY renovator, this is often the first document to buy because it anchors the rest of the application.
If the council cannot identify the site, the quality of your proposed kitchen layout does not matter yet. The application can be delayed before it reaches the design conversation.
What the block plan does
The block plan is the closer map.
It usually uses a 1:500 or 1:200 scale. It shows the property, boundaries, nearby buildings, access, hardstanding, and the proposal in relation to the site.
Think of it as the officer's "how does this sit on the plot?" document.
For a renovation, the block plan may need to show:
- The existing building footprint
- The proposed extension, porch, outbuilding, or access change
- Boundaries and distances to boundaries
- Driveways, paths, patios, and hardstanding
- Trees, rights of way, or drainage details if relevant
- Other buildings within the site
If your project changes the outside of the property, the block plan is usually the map that makes the physical relationship clear.
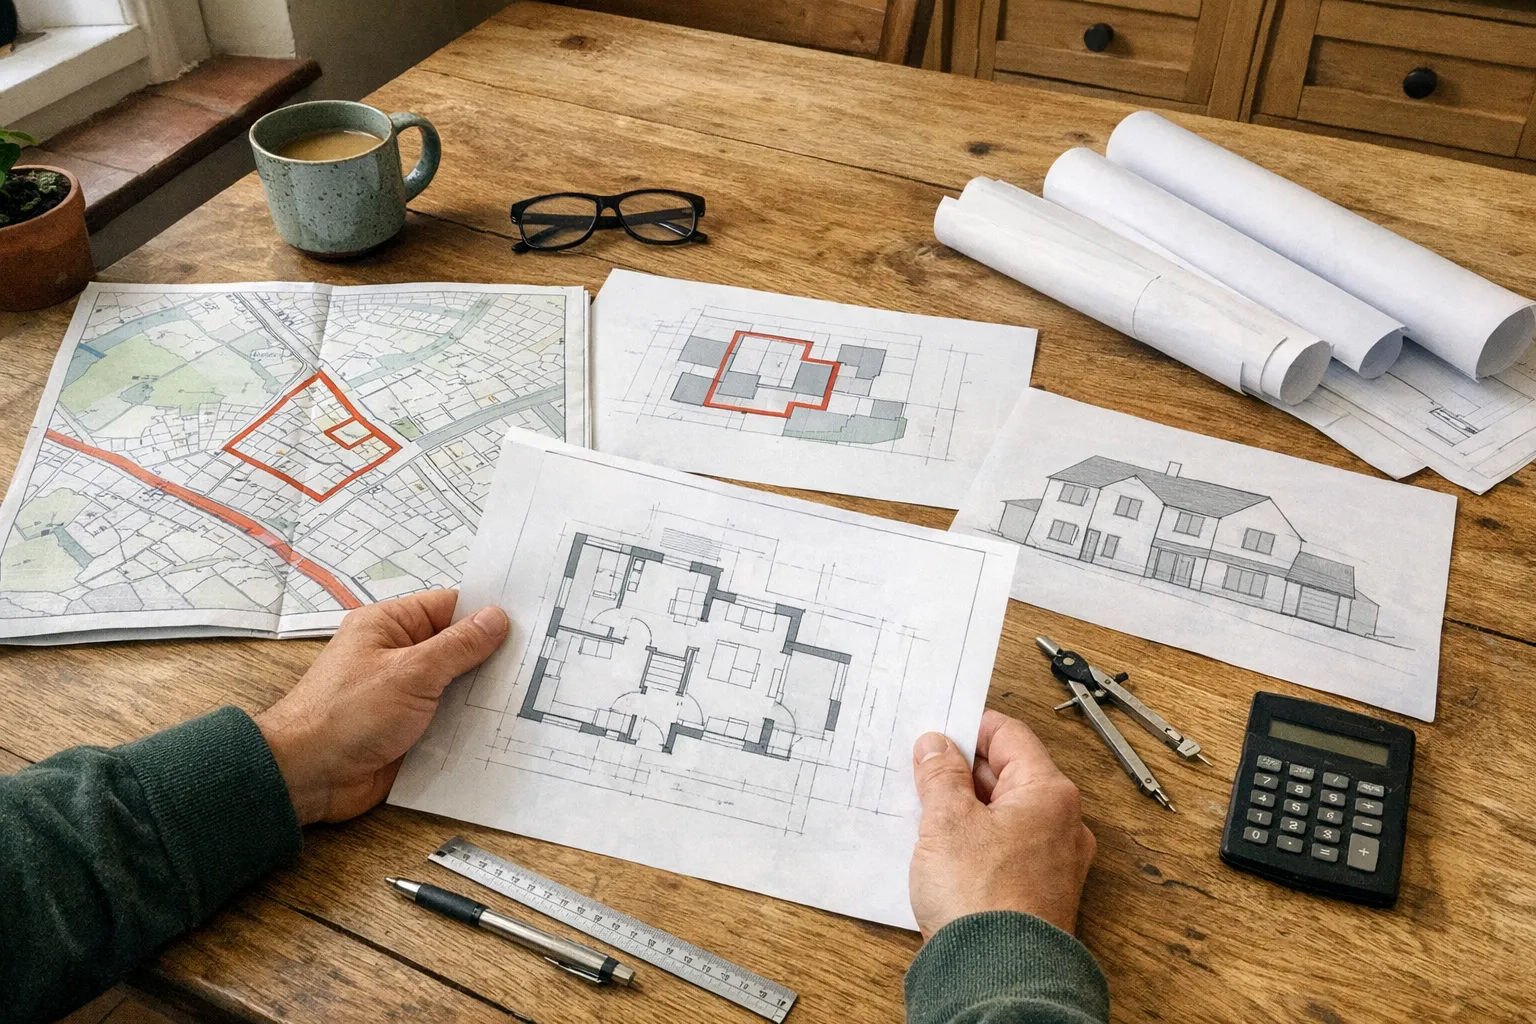
What the drawings do
Your planning maps are not expected to show every window, roof pitch, and internal room.
That is the role of the architectural drawings.
Depending on the renovation, you may need:
- Existing and proposed floor plans
- Existing and proposed elevations
- Roof plans
- Sections
- Street-scene drawings
- Specialist reports or statements
For example, a loft conversion may need roof plans and elevations because the roof shape changes. A rear extension may need proposed floor plans and elevations. A dropped kerb may need less building detail but more focus on access and frontage.
The map pack and drawing pack should agree with each other. If your block plan shows one extension size and your elevation shows another, expect questions.
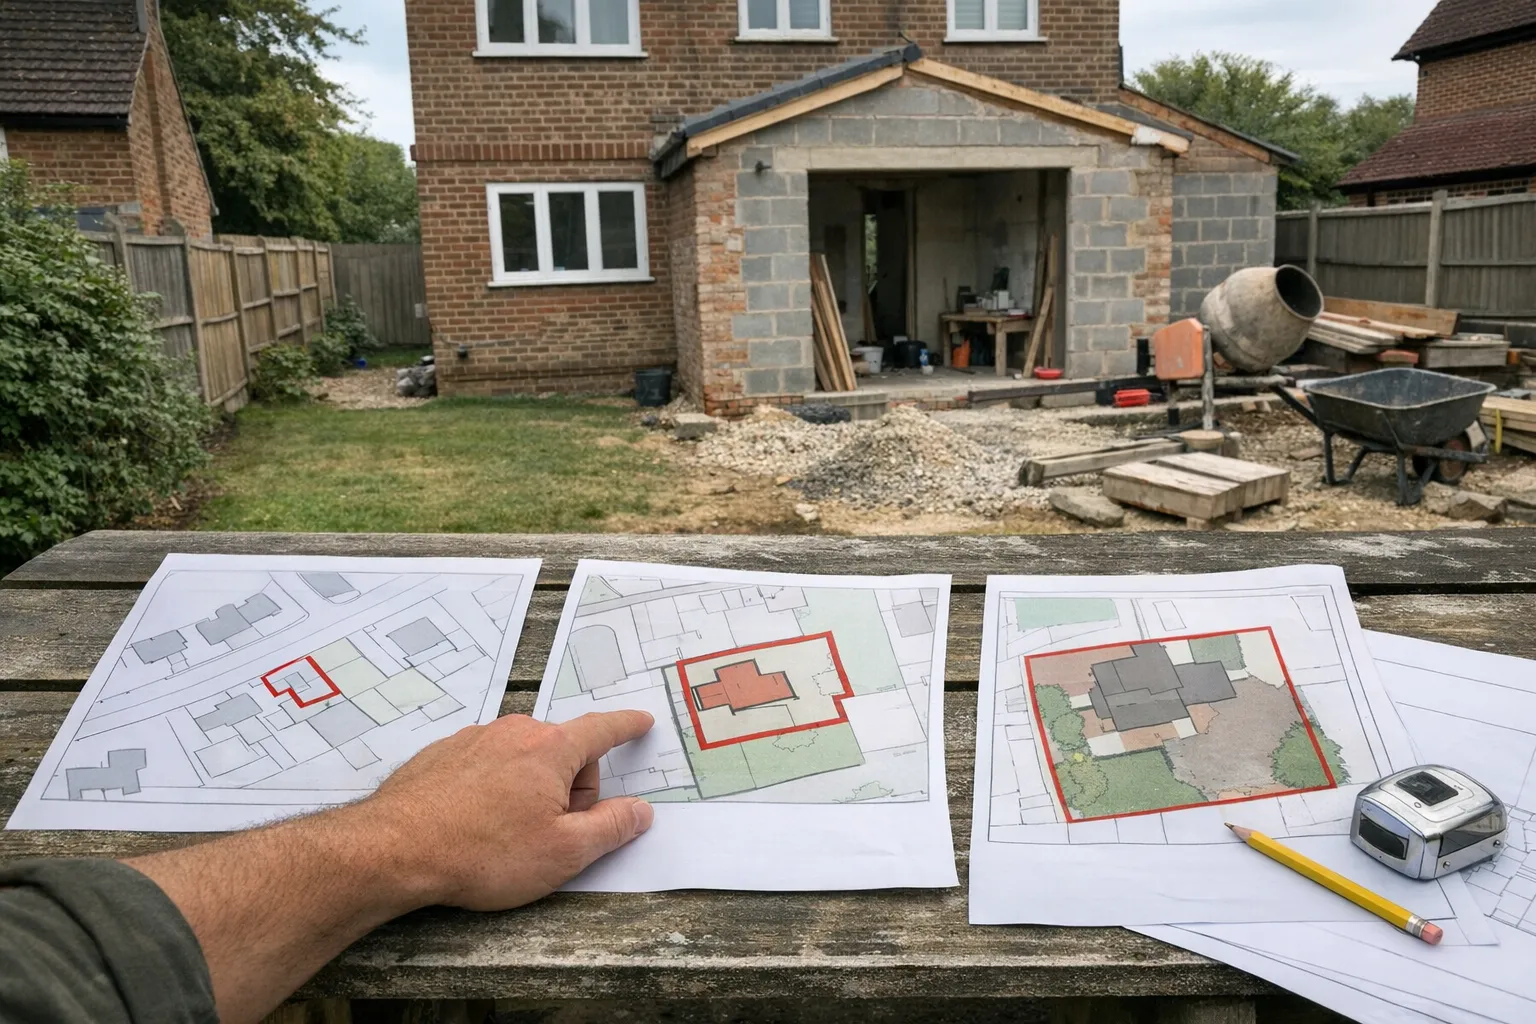
The red line: do not draw around only the work.
The red line: do not draw around only the work
DIY applicants often draw the red line around the bit they are changing.
That is usually wrong.
For most householder applications, the red line should show the whole application site. This often means the house, garden, driveway, access path, and land needed to carry out the development.
If you are building a garden room, do not just draw around the garden room. If you are changing a driveway, do not forget the route to the public highway. If you are extending the kitchen, do not crop out the garden and side access.
The red line defines the planning site. It should be consistent across your planning maps and application documents.
If you own nearby land that is not part of the application, that may be shown with a blue line. If you do not know whether land is owned, controlled, shared, or private, check before submitting.
Can you use free maps?
Free online maps are useful for learning about your site.
They are not usually suitable as planning application maps.
There are three common problems:
- The map is a screenshot, not a licensed planning document.
- The map does not show the correct scale, north point, or licence details.
- The map is not set up for a council-ready red-line boundary.
That does not mean every free tool is useless. They can help you understand the site, measure rough distances, or talk through the project with family and builders.
But when it comes to submission, use a proper Ordnance Survey planning map. It is a small part of the project cost and a common source of avoidable validation delays.
When CAD is worth it
Many DIY applications can use PDF maps.
CAD becomes useful when someone else needs to work from the base mapping. That might be an architect, planning consultant, structural engineer, drainage designer, or builder preparing a more technical package.
Use CAD if:
- A designer asks for DWG or DXF
- The site is awkward or large
- The project will go through several design versions
- Several professionals need the same editable base
Skip CAD if:
- You only need upload-ready PDF maps
- The proposal is simple
- No one has asked for editable files
If in doubt, ask your designer one direct question: "Do you want PDF maps only, or do you need CAD?"
A simple DIY renovation document order
For many projects, this sequence works well:
- Check whether planning permission or a Lawful Development Certificate is needed.
- Read your council's validation checklist.
- Buy the location plan and block plan.
- Prepare or commission the drawings.
- Check the red line, scale, north point, and address.
- Compare every document for consistency.
- Upload the application.
If you are still deciding which map to buy, use the Which planning map do I need? tool. It is built for exactly this stage.
The practical takeaway.
The practical takeaway
A DIY planning application is not about pretending to be an architect.
It is about giving the council enough clear information to validate and assess the proposal.
The maps do not need to be mysterious. The location plan shows where the site is. The block plan shows how the proposal sits on the plot. The drawings show what the building work looks like.
Get those roles clear, and the application becomes much easier to assemble.