
Rural planning applications create a mapping problem that is easy to miss: the site may be clear to the owner but difficult for somebody else to locate from a small, tightly cropped plan.
A long driveway, farm track, field access or isolated building can disappear from the page even when the proposed structure itself is visible. A good rural map shows the site, the route to it and enough surrounding context for the planning authority to understand the location without guesswork.
If you are ordering now, start with the site location plan tool, review the wider preview and add a block plan when the detailed site layout also needs to be shown.
Start with the route to the site
For a rural proposal, ask three questions before drawing the red line:
- What land is being developed?
- What land is needed to access and carry out the development?
- Where does that access connect to the public highway?
The answer may include more than the field containing the new building. It could include a private drive, shared track, turning area, visibility splay, parking area or service route.
That does not automatically mean every part of a farm belongs in the application. The boundary should reflect the proposal and the land necessary to deliver it.
Choose the scale for the context, not just the site
A 1:1250 location plan may be suitable for a rural property close to named roads and surrounding buildings. For a larger or isolated site, 1:2500 may show the nearest road, settlement or landmark more clearly.
The wider scale is not automatically better. If the site becomes too small to identify, the map has solved one problem by creating another. Check that:
- The complete red boundary is visible.
- The access route is not cropped at the sheet edge.
- The public highway or connecting road can be identified.
- Nearby buildings, roads or landmarks provide useful context.
- The red line remains legible at the ordered paper size.
Where one sheet cannot communicate both the regional context and the detailed layout, use coordinated location and block plans rather than reducing everything until it becomes unreadable.
Show access without claiming ownership
An access track may be needed for the application even when the applicant does not own it. Including land in the red application boundary is not the same as making an ownership declaration.
The application form and ownership certificate deal with ownership and notices. The planning map defines the land to which the proposal relates. Those records need to be considered together.
For a shared drive, check whether the proposal depends on the route, whether works are proposed to it, and whether the relevant authority expects it to be included. If another person owns part of the route, obtain the correct ownership information rather than changing the map colour to hide the issue.
Use the block plan for local detail
The location plan is the wider identification map. A rural block plan can then show:
- The existing building or yard.
- The proposed footprint.
- Access and turning areas.
- Nearby structures.
- Field boundaries, walls, hedges or trees where relevant.
- Parking, drainage or landscaping connected to the proposal.
The detailed plan should use a scale and coverage that allow the council to assess the proposal. A 1:500 plan is common, but a compact or complex site may need 1:200 if the authority or designer requires more detail.
Rural-map mistakes that cause avoidable questions
- Choosing 1:1250 because it is familiar when the site needs wider context.
- Leaving the access track outside the red boundary.
- Cropping the route to the public highway.
- Showing a field boundary but not the proposed operational area.
- Using a different red line on the location and block plans.
- Treating a title plan as a substitute for a licensed planning map.
- Printing the PDF at Fit to Page and changing its scale.
Use the planning map scale chooser if you are unsure, and check the current local validation list before submitting. Rural sites are often less forgiving of a generic map extent, but a wider plan is only useful when the important route and context remain clear.
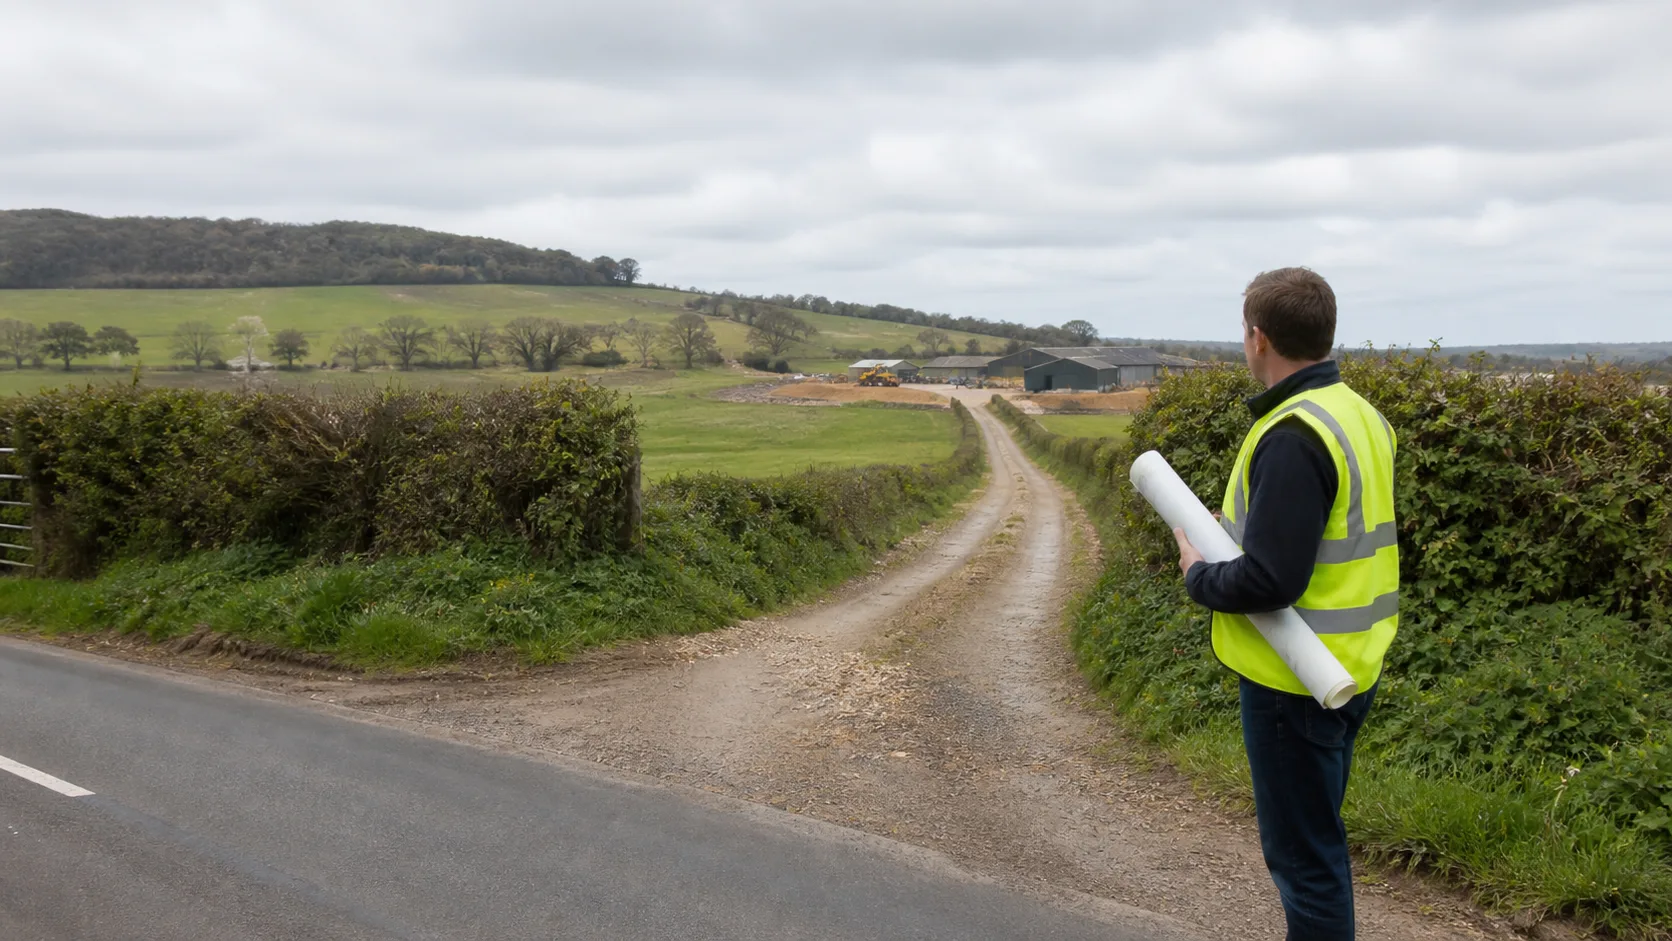
For rural applications, the route from the public highway to the application site may be an important part of the map context.
Distinguish four different access questions
The line visible on a map can carry several meanings, and they should not be collapsed into one assumption.
| Question | Evidence to consult |
|---|---|
| Does a physical track exist? | Current mapping, survey and site inspection |
| Is it a public highway or right of way? | Highway authority records or definitive map, as applicable |
| Does the applicant own it? | Title register, plan and relevant deeds |
| Does the applicant have a right to use it? | Easements, leases, agreements and legal advice |
An OS line shows topographic context; it does not by itself answer the last three questions. Label a route “existing track” unless its legal status has been checked from the proper source.
Show the whole route, then the critical detail
Use a wider location plan to connect the site to a named public road. Where the junction, gate, passing places, bridge or tight bend matters, add a surveyed detailed plan at an appropriate scale. A single 1:2500 sheet may locate the route but cannot reliably communicate centimetre-level widths or visibility.
The Planning Portal’s location-plan criteria recognise that rural sites may need 1:2500 coverage and enough roads or landmarks to be identifiable. Its general site-plan guidance explains the separate role of closer 1:200 or 1:500 information.
Run an access evidence audit
If access is material to the application, compare the plan with dated photographs and, where safe and authorised, a site inspection. Check:
- the actual public-road connection and gate position;
- surface width and condition at relevant pinch points;
- bends, gradients, bridges and drainage features;
- neighbouring entrances and buildings;
- public paths or other recorded routes;
- the land needed for any proposed widening, visibility or passing work.
Do not draw visibility splays or vehicle tracking casually. Use an appropriate survey and competent highways input where the assessment depends on them.
Coordinate the red line and ownership position
If the access is necessary to carry out or operate the development, decide deliberately whether it belongs within the red application boundary. Then make the ownership certificate and notices consistent. A blue line is not shorthand for land over which someone merely has a right of way.
HM Land Registry’s guidance explains that title plans normally show general boundaries rather than precise legal lines. Narrow access rights can turn on deed wording and plans, so obtain legal advice rather than measuring from the title-plan edging.
Make an unfamiliar site easy to find
Rural addresses can be ambiguous or absent from ordinary address databases. Include a clear site description, grid reference where appropriate, named road and recognisable landmark. The Planning Portal advises that a grid reference can be used where a site has no postcode.
The best rural access map gives the reviewer confidence in three stages: this is the right place, this is the route being relied on, and these are the detailed features assessed elsewhere. It does not claim more than the evidence supports.
Worked route example: a barn behind several fields
Consider a barn reached by 700 m of private track from an unclassified road. The first 150 m is shared with a neighbouring home, the route crosses a culvert and the final bend passes a public footpath. Outlining only the barn makes the access relationship invisible. Drawing the entire farm title in red says little about which route the proposal relies on.
Use the location plan to show the barn, complete relied-upon route and public-road connection at a readable rural scale. Give the junction, shared section, culvert and path simple references. Use a separate surveyed access plan for widths, visibility or vehicle tracking. Then make the transport statement and photographs use those same references.
The ownership review should ask who owns each track section and what rights benefit the application land. That work may affect the application certificate or notices, but it should not be improvised from the OS linework. Where the route crosses third-party land, seek advice early rather than after the design assumes unrestricted access.
A final rural-map quality test
Hand the page to someone unfamiliar with the holding and ask them to trace the journey aloud. They should be able to say where the public road ends, which track reaches the site and where the detailed drawing takes over. Next, ask them which labels describe verified legal status. Ideally none do unless supported by the relevant official record or document.
Finally, check seasonality. Hedgerows, foliage, temporary farm storage and poor weather can make a junction look different from aerial imagery or an earlier visit. Date photographs and surveys, and avoid presenting an old visual record as current. A map remains the stable index; the dated evidence records the conditions that the base cannot.
Public Rights of Way: The Definitive Map and Statement
Rural tracks frequently carry dual status as private vehicular drives and statutory Public Rights of Way (PRoW) recorded under the National Parks and Access to the Countryside Act 1949 and the Wildlife and Countryside Act 1981:
1. The Four Statutory Public Path Categories
Your county council or unitary authority maintains a legal Definitive Map and Statement classifying rights of way:
- Public Footpath: Pedestrian access only (including dogs, pushchairs, and mobility aids).
- Public Bridleway: Pedestrians, equestrians, and pedal cyclists.
- Restricted Byway: Pedestrians, horses, bicycles, and non-mechanised vehicles (e.g. horse-drawn carriages).
- Byway Open to All Traffic (BOAT): Carries full public vehicular rights, though largely used for recreation.
2. The Planning Trap: Intensifying Traffic Across a Footpath
If your proposal intensifies vehicular traffic along a public footpath or bridleway:
- The council’s PRoW officer must be formally consulted.
- Case officers will assess pedestrian safety, gate widths, and sightlines.
- If physical alterations to the track obstruct or alter the right of way, you must apply for a formal Public Path Diversion Order under Section 257 of the Town and Country Planning Act 1990. Standard planning permission does not grant automatic authority to obstruct or divert a public right of way!
Technical Access Engineering: Passing Bays, Fire Engines, and Refuse
Long rural access routes cannot simply be drawn as a narrow ribbon; they must satisfy statutory highway and building regulation criteria:
1. Fire Service Emergency Access (Approved Document B5)
Under Approved Document B (Fire Safety) Section B5, access roads serving domestic or commercial properties must accommodate fire service appliances:
- Minimum Width: 3.7 metres between kerbs (reducible to 3.1 metres at pinch points like stone gate pillars).
- Minimum Carrying Capacity: The road sub-base must support 12.5 tonnes (up to 26 tonnes for high-reach rescue vehicles).
- Reversing Limits: Fire appliances cannot reverse more than 20 metres along a dead-end track. If your drive exceeds 20m, you must engineer and map a dedicated turning facility (either a 16.8m hammerhead or an 18-metre diameter turning circle).
2. Passing Bays and Intervisibility
Where an access track extends for hundreds of metres, highway officers routinely attach pre-commencement conditions requiring intervisible passing places:
- Spaced every 150 metres or positioned where oncoming drivers can maintain direct intervisibility.
- Standard dimensions: 5.5 metres wide over a 15-metre straight length, tapering smoothly back to the track width.
The Rule in Harris v Flower 1904: Private Easements vs Planning
Never confuse planning access with legal right of access. Under the century-old Court of Appeal doctrine established in Harris v Flower 1904:
- The Legal Principle: A private right of way granted to access "Plot A" (such as agricultural land) cannot be used to benefit or access "Plot B" (a newly acquired parcel or an intensified residential development) adjoining Plot A.
- The Planning Consequence: Even if the local authority approves your planning application with the access track in red, the landowner can obtain an immediate High Court injunction prohibiting you from driving across the track for domestic or commercial purposes. Always verify the precise wording of your deed grant before commissioning expensive planning maps.
Crossing Watercourses: Section 23 Land Drainage Act 1991
Rural access tracks almost always cross roadside drainage ditches or minor streams via concrete or brick pipe culverts:
- Ordinary Watercourse Consent: Under Section 23 of the Land Drainage Act 1991, any works to alter, pipe, culvert, or construct a headwall in a ditch require statutory consent from the Lead Local Flood Authority (LLFA) or Internal Drainage Board (IDB).
- Block Plan Annotation: Annotate all culverts, headwalls, and ditch outfalls within 10 metres of the access junction to show that sightline grading will not collapse watercourse banks.